
Upgrading Your Garage? A Complete Guide to Installing a New Door Opener
- COMMERCIAL GARAGE DOOR REPAIR
- GARAGE DOOR OPENER INSTALLATION
- GARAGE DOOR SPRING REPAIR
- SAME-DAY GARAGE DOOR REPAIR
- CUSTOM GARAGE DOOR
- GARAGE DOOR OPENER REPAIR
- GARAGE DOOR TRACK REPAIR
- GARAGE DOOR CABLE REPAIR
- GARAGE DOOR PANEL REPAIR
- LOCAL GARAGE DOOR REPAIR
- GARAGE DOOR REPLACEMENT
- NOISY GARAGE DOOR FIX
- GATE REPAIR
- GARAGE DOOR INSTALLATION
- GARAGE DOOR SECTION REPLACEMENT
- OVERHEAD GARAGE DOOR REPAIR
Upgrading Your Garage? A Complete Guide to Installing a New Door Opener
Thinking about upgrading your garage? Installing a new garage door opener is a must if you’re looking to make your life more convenient and your home more secure. But where do you start? This guide will walk you through everything you need to know about garage door opener installation, from selecting the right model to completing the job safely.
Why Install a New Garage Door Opener?
A new garage door opener can make a world of difference. Here’s why you should consider upgrading:
- Convenience: Modern models come with features like remote controls, smartphone integration, and motion detection.
- Safety: Newer garage door openers offer advanced safety options like auto-reverse and secure locking systems.
- Quiet Operation: Upgrading to a belt-driven or wall-mounted unit reduces noise, making your garage a quieter space.
- Home Value: A sleek and efficient garage door opener can boost your home’s appeal and market value.
Now that you know the perks, it’s time to get into the nitty-gritty of garage door opener installation.
Steps to Installing a New Garage Door Opener
For a smooth and safe garage door opener installation, follow these steps:
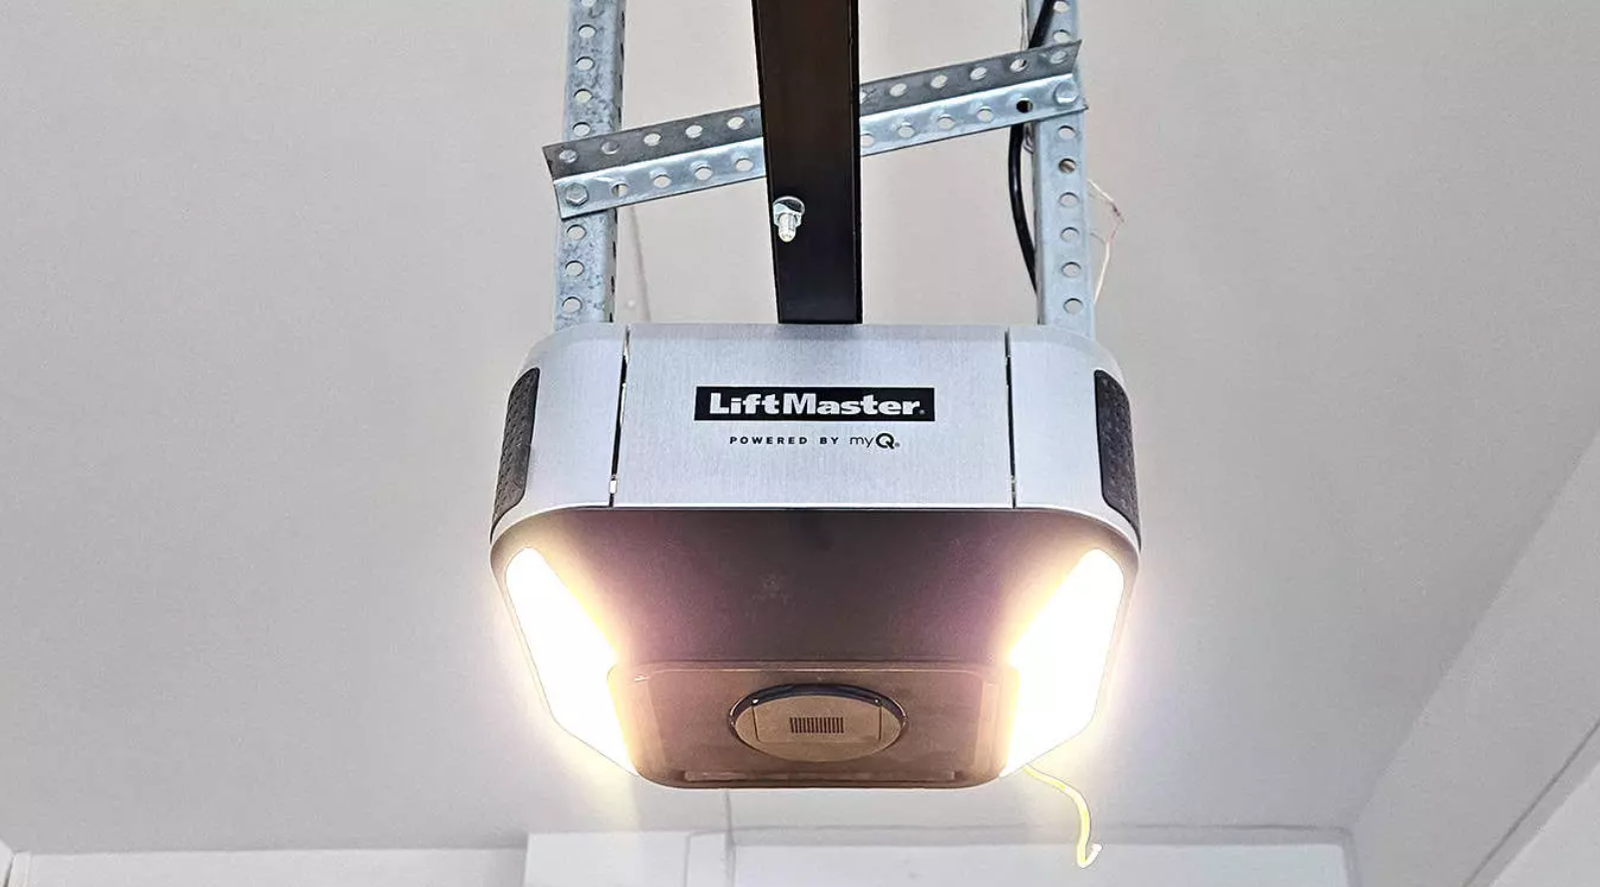
Step 1: Choose the right opener. Pick an opener that fits your needs. Chain drives are durable and budget-friendly but noisy, belt drives are quieter and great for attached garages, and screw drives are low-maintenance and work well in various climates. Consider horsepower: lighter doors need 1/3 or 1/2 horsepower, while heavier doors (like wooden ones) may need 3/4 horsepower or more. Decide if you want smart features, such as wi-fi-enabled openers for mobile app control.
Step 2: Read the manual. Every opener is different, so review the instructions first. The manual will list tools like a drill, screwdrivers, a ladder, a level, wrenches, and pliers, along with specific steps.
Step 3: Install the opener. If replacing an old unit, disconnect it first. Attach the rail to the motor and mount the header bracket at the center of the garage door. Securely connect the opener to the bracket, ensuring it’s level. Install and align the safety sensors near the bottom of the door tracks, and test the auto-reverse feature to ensure safety. Finally, plug in the opener and test the door to ensure it opens and closes smoothly.
Tips for a Seamless Installation
- Secure all connections and hardware to prevent any malfunctions.
- Ensure the power source is nearby, and don’t forget to test the backup battery (if applicable).
- If you feel uncertain at any point, consult a professional garage door technician.
Make the Most of Your New Garage Door Opener
Upgrading your garage is one of the best investments you can make for your home. By following these steps, you’ll have smooth and reliable operation in no time. Always prioritize safety and take your time during the installation process.
Considering hiring a pro? Reach out to Garage Door Repair Grove City Ohio to ensure your garage door opener installation is handled with expert care.